

No products in the cart.
Craft
Ghost Story Dice
“It was a dark and stormy night…”
Honestly, I’ve never been good at telling ghost stories. The best ones are too spooky for me to want to remember and anything else, well, just isn’t worth telling. But I’m always game for inventing a tale or two and for having a laugh with friends, and that’s exactly what story dice — or, in this case, ghost story dice — are good for.
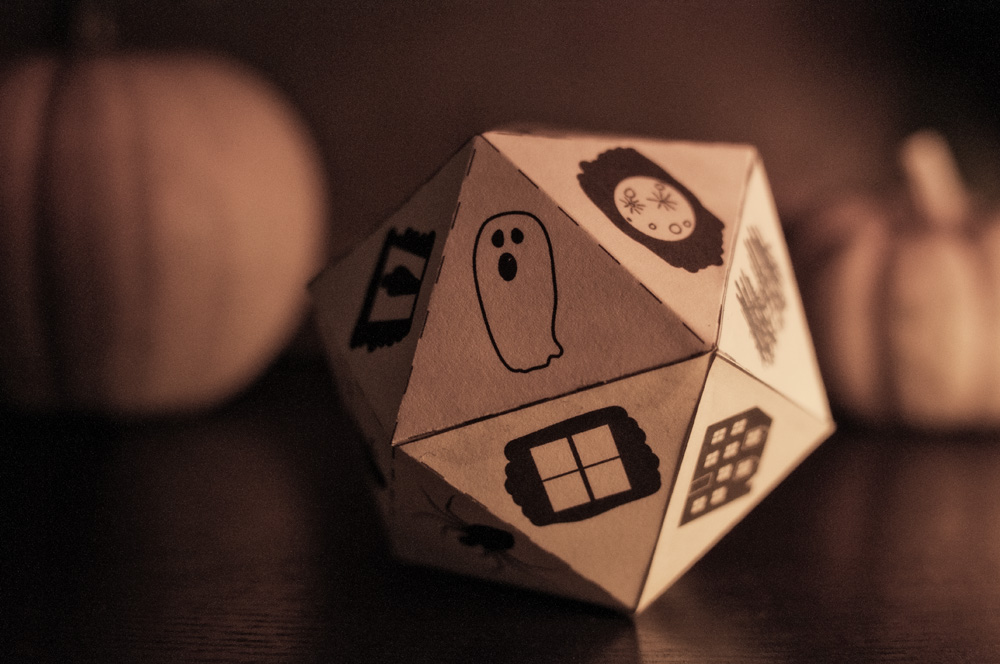
Story dice are exactly that: dice, but with images printed on each of the sides to act as random visual cues for ad lib storytelling in turns by a group of people. But ghost story connoisseurs are notorious for becoming easily bored, which means that ghost story dice calls for more variety than the traditional six-sided cube could offer. This paper dodecahedron boasts twenty cues for ghost story characters, props, settings, and plot twists. With a printer, something to cut with, and a little glue, you’ll be ready to whip up dozens of spooky stories in no time.
Here’s how it works: A player rolls the dice. He or she must then continue (or start) the story, incorporating whatever image lands at the top of the dice.
The fine details are up to you, but here are a few suggestions to help get the wheels turning:
- The player whose birthday is nearest, but not past, goes first. (Or the youngest. Or the oldest. Or the best at storytelling as determined by majority vote.)
- You may just instinctively know when a person’s turn is over, but if you want more control, use a timer and give each player two or three minutes to tell their part of the story.
- The same goes for ending the story. Usually, stories have a way of ending themselves but if yours refuses to lie down, set a limit to the number of rounds. Or offer the title of “winner” to the player who comes up with the killer ending. (Ha! Haha.)
- Be flexible! The possibilities are almost limitless: the skull could be bones or a skeleton; fire could be a flame, torch, or candle; the graveyard could also be a grave or gravestone. Think about what the images represent rather than what they depict.
- Record it! (If you dare.) You might just end up with something worth keeping.
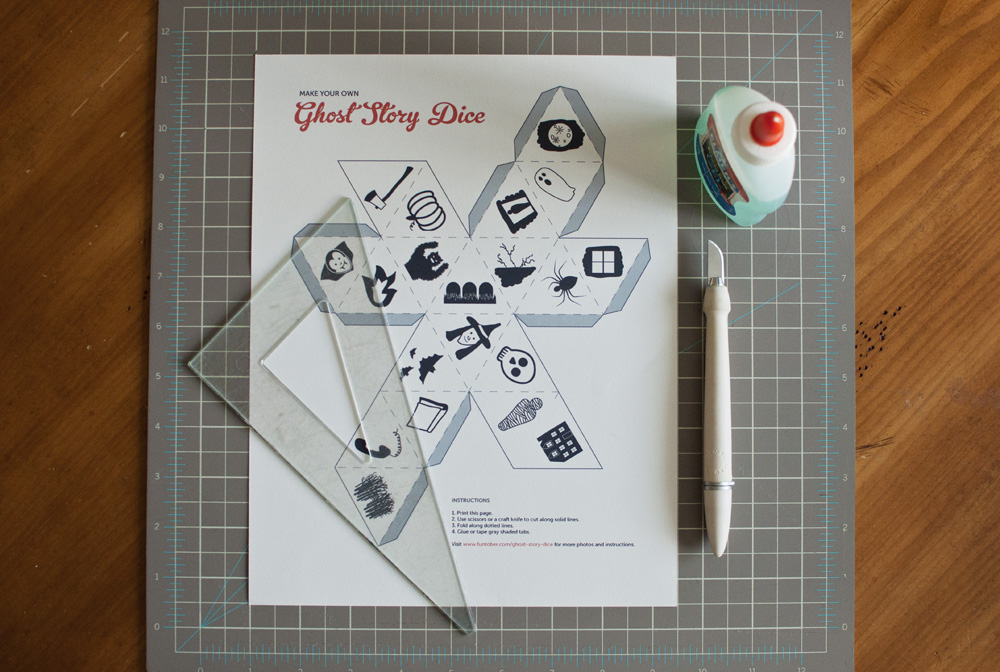
MATERIALS
- Ghost story dice template (PDF)
- Printer
- Paper
- Craft knife or scissors
- Glue
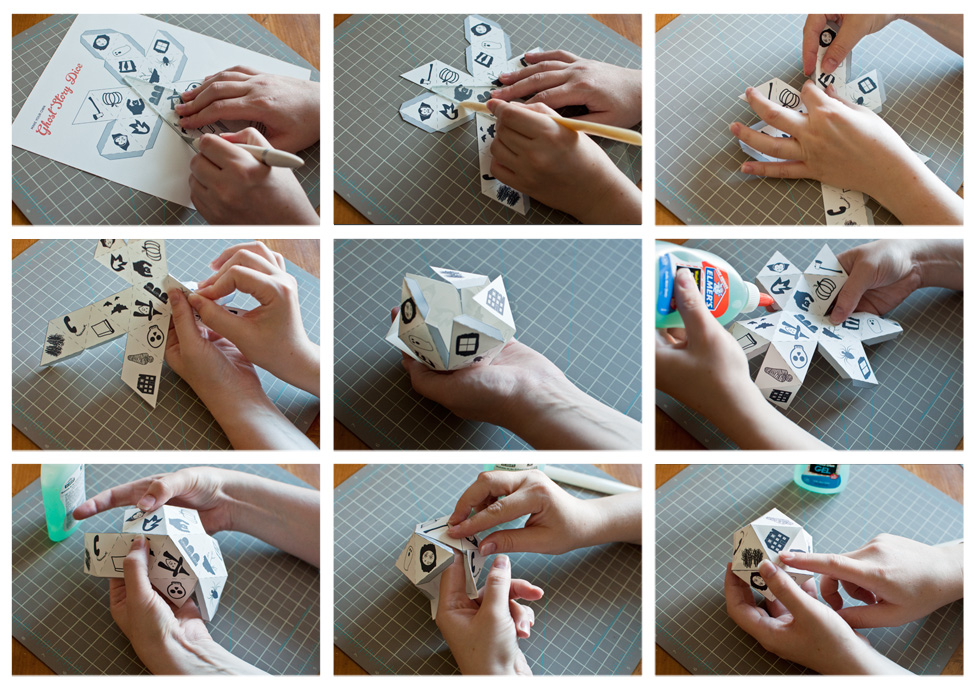
1. Print and cut out the template. Print on regular text-weight 8 1/2 x 11 inch paper. Cut around the perimeter of the template along the solid lines using a craft knife and straight edge or scissors. If you use a craft knife and straight edge, I recommend keeping the knife toward the outside of the template; that way, if your knife slips away from the straight edge, you are less likely to slice into the actual die.
2. Fold the template. Fold along the dotted lines. (If you’re using plain printer paper, it isn’t necessary to score first with a bone folder tool, but you can if you like to make the folds crisper.) I like to start by folding in the gray tabs and then folding the rest to create the facets. By creasing the fold lines first, it will make gluing easier as the die will begin to take form and it will be more apparent which sides go together.
3. Glue the tabs. It’s easiest to start from the center of the template (the graveyard) and work outward. Draw a thin bead of glue along the tabs closest to the center and adhere to the underside of the adjacent facet. So, you’ll start by connecting the shadow to the pumpkin, the fire to the bats, and the spider to the skull. Continue working up and around.
HINT: Glue the house side last.
As you get closer to the end, you may find it more difficult to work with the tabs. I found it helpful to use one finger inside the die to help guide and press the tab from the inside, while adjusting the facets with my other hand from the outside.
When you’ve finished gluing, allow the die to dry for 30 minutes or more before use.
I love it! it looks great and I think it could turn into a great and fun activity with the kids!
Absolutely! Kids are great at making up stories.
Pingback: 25 Halloween Crafts (Perfect for Kids, Parties, Decorations and more!) - Raining Hot Coupons