

No products in the cart.
Craft, Halloween Crafts Fun
Dip-dyed Pine Cones
17
Sep
Sep
My mom used to decorate for every single holiday and season when I was a kid. Of course, things always got exciting when October approached. There was natural and crafted bounty galore: pumpkins, gourds, and hay bales from the farmers market, homemade scarecrows, paper bats, leaves, spider webs, and jack-o-lanterns.
It’s a tradition I’ve carried with me into adulthood, albeit in my own way. I tend to like my seasonal decorations to be subtle, at least to begin with: blending in with my existing home decor, rather than adding a layer on top of it. And natural elements are always welcome.
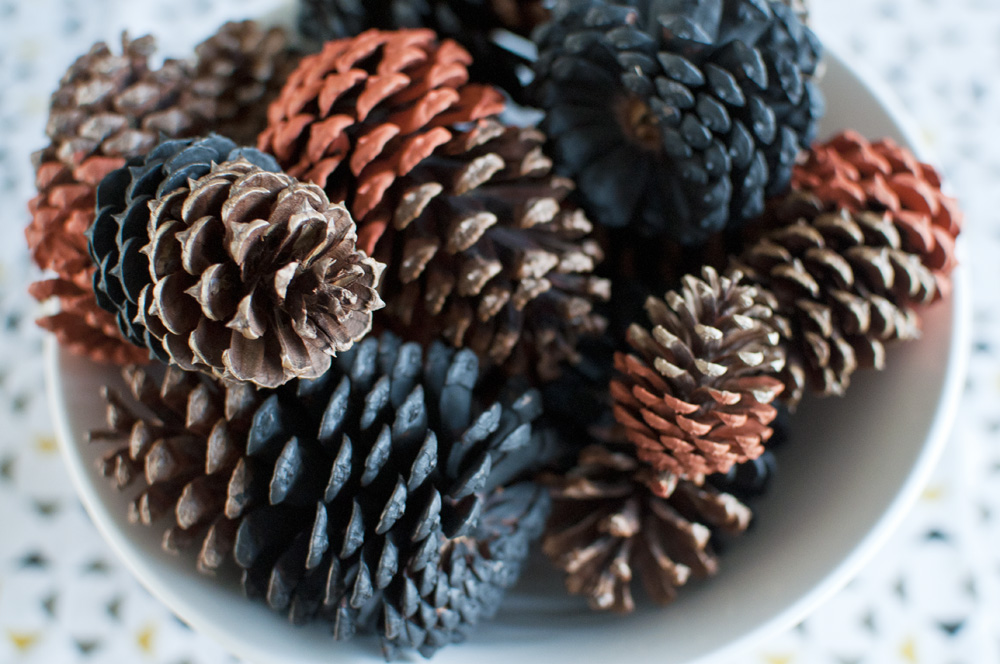
This is why pine cones hold a special place in my heart. They’re natural, sturdy, and free, and the orderliness of their design says both “rustic” and “sophisticated.” But while pine cones look great on their own, I think they also look great with a little color. In orange and black, it’s a quick and inexpensive way to sneak some Halloween into your home — even if it is a little early.
The look of this project is meant to mimic the dip-dyed trend that’s been happening in fashion and home decor. Despite the name, however, these pine cones aren’t actually dipped. In order to make the paint thin enough for dipping, you would have to water it down. But when pine cones get wet, the scales close. Normally, they’d open again when dry, but the paint causes the scales to stick together and stay closed. So if we were to actually dip them, we’d end up with half-closed painted pine cones.
MATERIALS
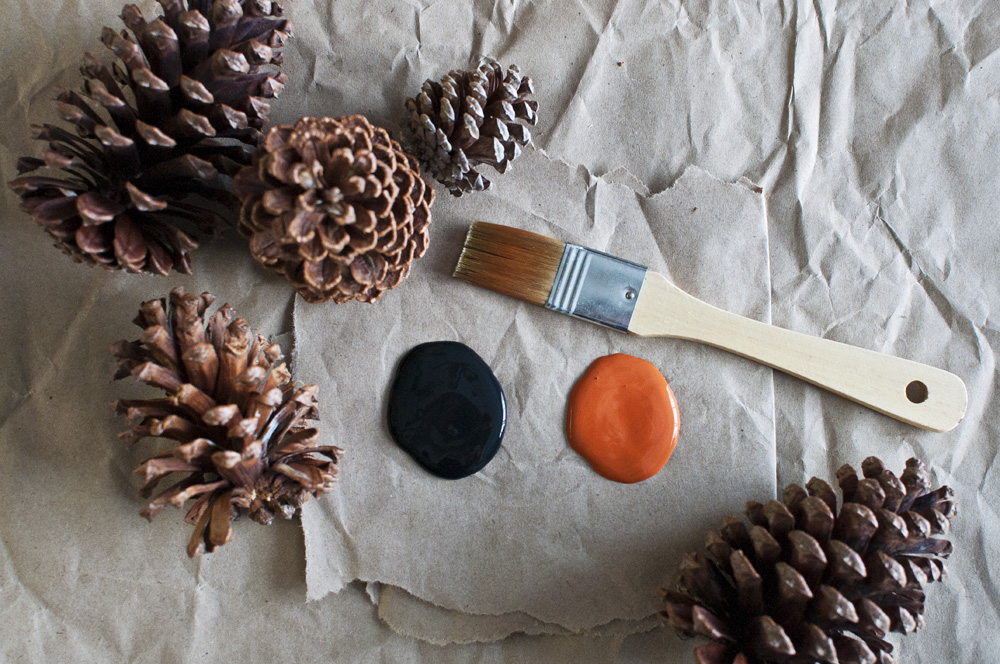
To make your own, here’s what you’ll need:
- Acrylic craft paint
- Water
- 1-inch, flat paintbrush
- Pine cones
BEFORE YOU BEGIN
It’s important to note that this project calls for acrylic craft paint as opposed to acrylic artist’s paint. Craft paint is thinner and less viscous and will be easier to work with for this type of project. It’s also significantly less expensive.
Acrylic paint is great for crafts like this because it’s easy to work with, easy to clean up, dries quickly, and is water resistant once it’s dry. What this also means is that if you drip or splatter it onto your favorite shirt or dining room rug, it is very difficult to remove — and basically impossible once dry. When you’re painting pine cones, paint WILL splatter. Make sure you cover your work surface and wear something that you wouldn’t mind accidentally ruining. (Likewise, you probably don’t want to keep your iPhone right next to you — unless you don’t mind giving it a festive, speckled custom paint job.) Keep some clean, cool water and a rag handy for emergency clean-ups.
Additionally, pine cones can be sharp! I’ve never actually cut myself on a pine cone but I won’t say it can’t happen, and trying to handle an especially prickly one can be kind of a drag. Please be sure to inspect the pine cones before handing them over to young children or grown-ups with delicate fingers.
Ready? Me too!
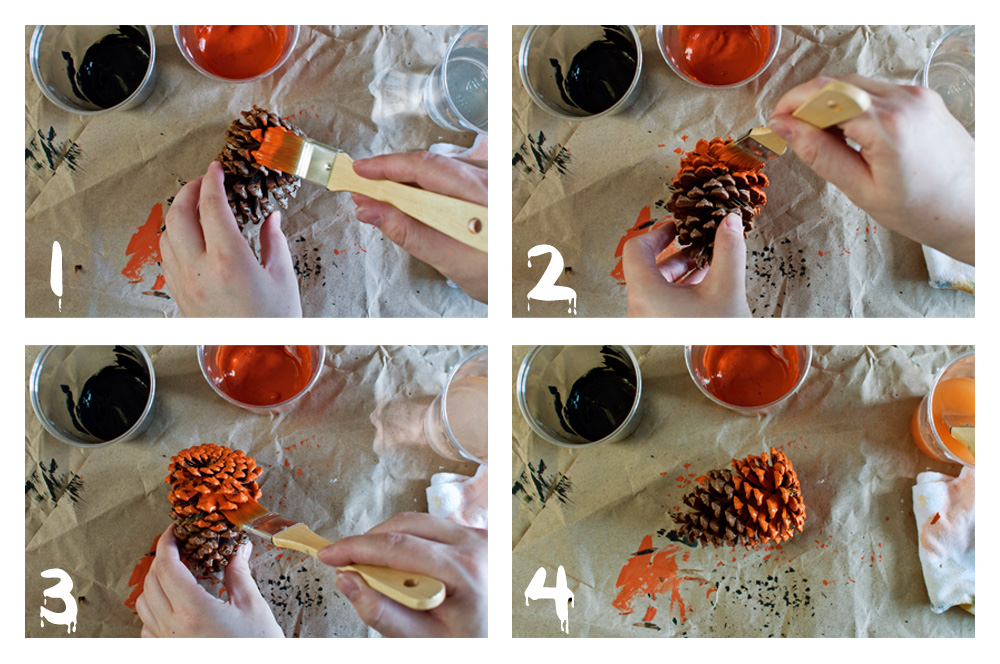
1. Define the painted area. Take your paintbrush and dip it in some clean water. (Don’t blot it.) Then, dip it in paint. Try to get an even coating on the bristles by pouncing the brush lightly and then tapping the flat side of the bristles against the edge of the cup (or whatever vessel you’re using to contain the paint). You want the brush to be heavily loaded with paint, but not dripping.
Decide how much of the pine cone you want to be painted, and paint the outside of the scales in the portion you choose. It’s easiest if you take the pine cone in one hand and the paintbrush in the other, and hold the paintbrush in one place while you rotate the pine cone against the flat side of the bristles.
NOTE: Because the scales are arranged in a spiral — rather than rows — from top to bottom, it can be difficult to know where to stop your top border. I tend to pick a spot and end up painting more than I intended because I think too much about creating a perfect line. If you look carefully at photos 1 and 4 above, you can see that I originally made my top border about one-third of the way from the bottom (1), but ended up painting half of the pine cone (4). Don’t be like me. Relax and remember that “approximate” is okay.
2. Paint the tops of the scales. Next, you want to paint the inner part of the pine cone — the tops and bottoms of the scales. It’s easy to paint the tops because they’re fairly flat; the bottoms are trickier because of the spike at the end of each scale. Load more paint on the brush, if necessary. Hold the flat side of the brush parallel with the tops of the scales, insert the brush between the rows and apply paint to the scales while pulling the brush back out again.
3. Paint the undersides of the scales. Turn the pine cone upside down and repeat the same technique used in step 2 to paint the undersides of the scales. To cover the back side of the spike, angle the brush a little higher and give it a wiggle from side to side. If you’re anything like me, you’ll want to remember this: it doesn’t have to be perfectly perfect.
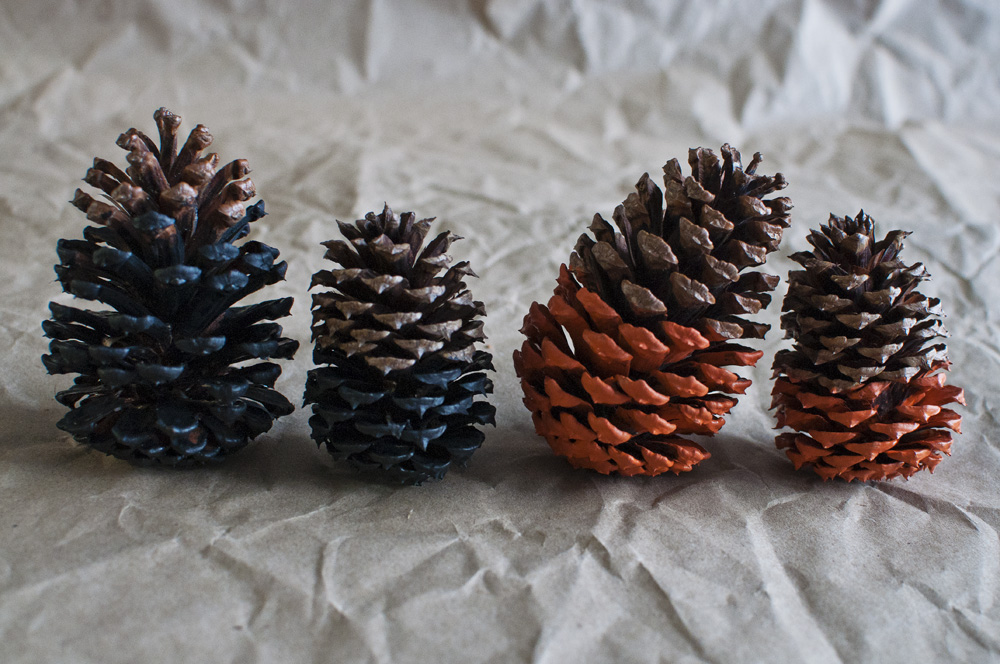
4. Dry. When you’ve finished painting, let the pine cone dry for at least 30 minutes before handling the painted area. I like to let the paint dry for several hours before doing anything else with them.
These would look nice lined up on a mantle or shelf, tossed in a bowl, or tied to some twine as a garland. It’s a nice, subtle way to add a festive touch to your home.
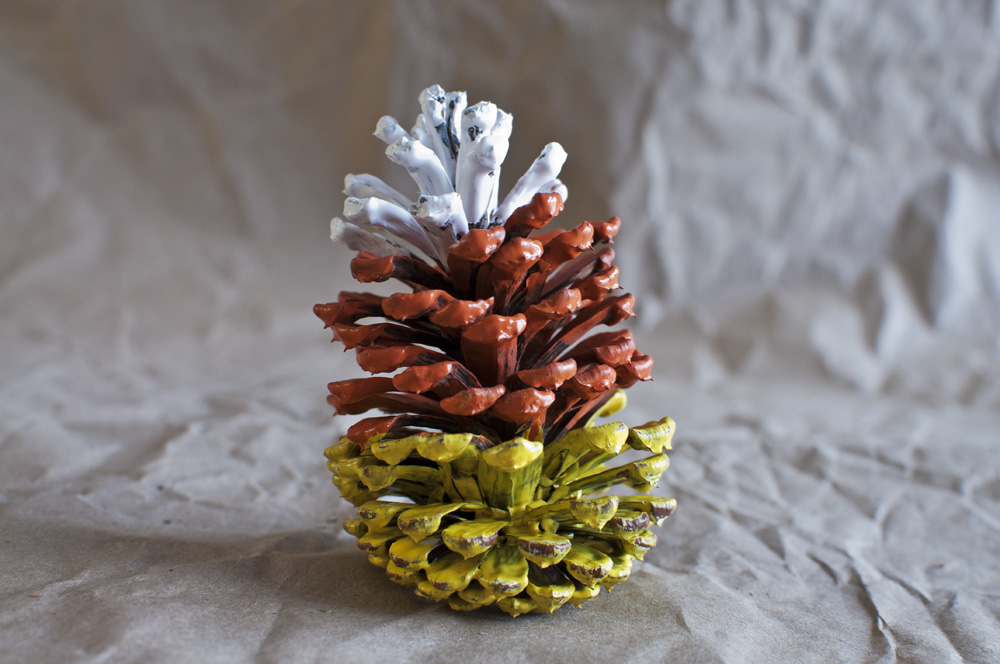
You’re not limited to one color, either! And you can paint the whole pine cone if you want, although it’s a bit easier to paint a portion, let it dry, and then paint the other portion so that you can hold onto it without getting paint all over your fingers.
If you’d like the pine cones to last for several years, you can seal them with an acrylic spray sealer, which you can usually find at an arts and crafts store. It’s typically available in gloss, satin, or matte finishes; choose whichever you like (I tend to go for matte for a more natural look). Spray outside on a mild day or in a very well ventilated area, away from open flame, and let the sealer dry for an hour or more before bringing the pine cones inside to avoid bringing the fumes in with them.
I’m envisioning a row of painted pinecone monsters!
I can’t wait to see that! Good idea.
I work in a garden center, and christmas is our busiest season we sell xmas trees, I decorator wreaths and grave blankets. Well last year I decided to paint the pine cones white ,the grave blankets looked so much nicer . At first my boss was piss he said I was wasting time ,but when he seen how nice they looked he was happy. The one thing I do before painting them is I wire the pine cone.. Florist wire and wrap the wire at the bottom of pine cone, that way you can hold the wire instead of the pine cone. Less paint on your fingers.. Makes it much easier.
is there anyway I can keep painted pinecones open for outside decorations?